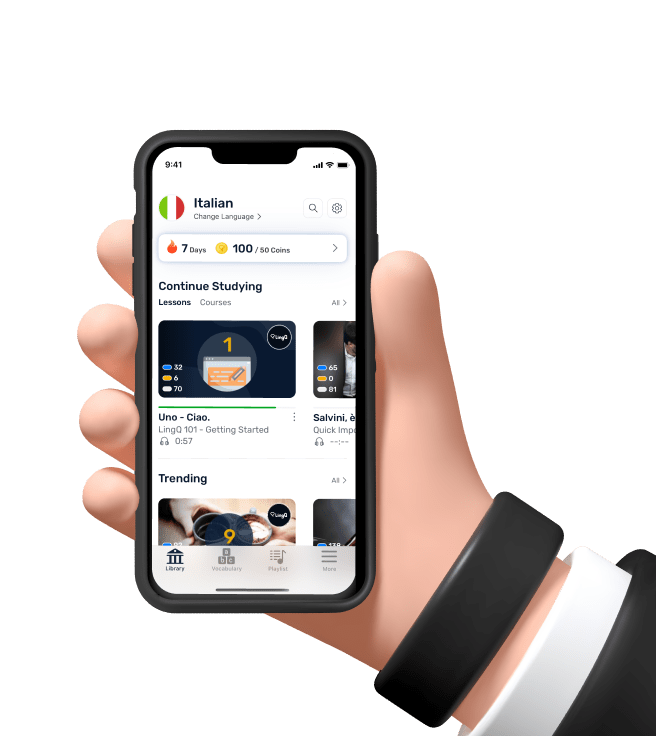
The Best Note-Taking App for the iPad
- Oh hey there guys.
So about a year ago I did a video about the iPad Pro
and how it works as a note-taking device
versus paper notebooks
and you guys really liked that video
so I thought it was high time to do another one.
But, as an entrepreneur, I believe in delegation.
So, I delegated not just the editing,
but the script writing and research process for this video
to my editor Tony. - Woo.
And I thought it was only fair that you get
to be on camera for this one because--
- Yeah, 'cause, you know, I did the research.
- Yeah, I think you actually know more about this than I do.
So, what we were originally going to do
was a video breaking down what we thought
were the top five or six note-taking apps for the iPad,
both for the Pro and the base model,
and we're gonna talk a little bit later in the video
about how these two devices are kind of different,
but when you were doing the research
you kind of found a clear winner right?
- [Tony] Yeah, so like right away I immediately thought
that Notability had, not only the most features,
but it just felt really good to use as well.
- And that's actually kind of a departure
from that original iPad Pro note-taking video
that we did where I used Noteshelf,
and I think Noteshelf is a fantastic app
and it's definitely one of the top three
that I would recommend
if you weren't gonna go with Notability
but when we were doing the research,
you brought up Notability, I checked it out,
and it is kind of hands-down the best app.
- Oh yeah, definitely.
- So, what we're gonna do in this video
is break down five kind of advanced note-taking tips
for the iPad and we're gonna use Notability
as the example app here,
but I do wanna note that for most of these tips
you can do either the same thing or something very similar
in other apps out there.
But real quick, lightning run here
what will be your top three recommendations for apps
for people who are not gonna use Notability?
- All right, so if you're not using Notability,
like Tom said, use Noteshelf, that's a good one.
You can also go with GoodNotes 5,
which is another app that I use intensively
and as well as just the built in Apple Notes app
because that you can still write and also type notes.
- [Thomas] And it's the only one there that's free,
so that's worth noting. - Yes, keep in mind,
a lot of these, or actually all of them,
that we're recommending are paid.
- Yeah, but let's get into these tips
starting with the first one,
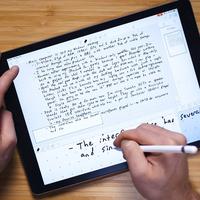
which is going to be to use the magnifier tool.
Now the problem I have with writing on an iPad
and I guess I have a couple of problems,
'cause honestly writing on notebook paper feels amazing,
but one of the big problems is that I don't wanna
have to constantly pinch-and-zoom
to be able to write within these lines here,
and I'm not going to be able to write legible text here.
So a lot of these apps solve this problem
by giving you a magnifier tool.
And in Notability you can just come down here,
if you have the pencil tool active,
click here and you get this little window
where you can just create notes.
So, I'll just go over here and why don't I make a list
of groceries not to buy later (laughs)
And one of the things I really like about this app
is there's this little blue area on the right
and once your pencil goes into it
it's actually gonna move the magnifier,
either to the right, or it's going to go to the next line
if you're already at the right.
And it's adjustable so if you wanna have it here
instead of here you could do that,
so I'm gonna go there,
or you can just hit one of these buttons
to go over or down if you want to manually.
I haven't figured out how to make
this like multi-column thing work
so it's a little bit of a pain but you know,
let's just go with like porcupine needles.
So, I mean already this is like,
again it's not as good as writing on paper for me,
but this is kind of a nice experience
and I think with some of the other tips
we're gonna talk about,
the slight trade-off in convenience
might be worth it for some people.
- Yeah, definitely, I mean again,
it's not gonna replace paper
but a lot of these features actually adds on
to the fact that you're using an iPad as opposed to paper.
So we're gonna move on to the second tip
which is being able to do audio recordings
as you're writing your notes
and have the audio match the notes that you are writing.
So up here on top--
- This is like my favorite feature.
This is the game changing feature,
specifically with Notability.
- [Tony] Which is amazing, so we're gonna go ahead and click
this little microphone up top. - [Thomas] Boop.
- [Tony] And it's gonna start audio recording everything
that I'm saying or if, for example,
as if your teacher was saying if you got permission
in class to do so.
So we're gonna go and just go ahead and start writing,
so let's say we write a list of things
you do wanna buy at a store--
- [Thomas] I'm gonna keep going with my list
of things that I don't wanna buy.
- [Tony] Yeah go ahead.
- 'Cause I don't know, like I also don't wanna buy
like poison, or I don't know,
like maybe like Kenny Loggins box sets.
(Tony and Thomas laughing)
All right, so we're recording.
Here's the thing about Notability,
'cause Noteshelf can record and attach to notes as well
and with any app you could just record a voice note
in the background and then just look at it later,
but with Notability, once you're done recording
your recording is actually synced
with the speed at which you took your notes.
So if you go in here and you replay,
it's going to show,
"all right, now class I'm gonna give you a list..."
a little overlay and let me
take this volume down just a little bit,
but it's gonna show a, kind of like, a grayed out version
of what you took and then if you tap on the text,
it will skip to the audio that was happening
at the time you wrote that, which is pretty amazing,
because now you don't have to scrub through
like half an hour or an hour of lecture material,
you can just be like, "all right, I can't remember
"what the professor said at this point",
or maybe, they were talking too fast,
like I probably am right now,
and you only got a little bit of it written down.
Well, you can go back in time essentially
and see what they were saying
and then you could fill out your notes even more completely,
which is kind of a game changer.
Okay, so tip number three, and I'm gonna use my hand
that's not holding Apple Pencil, if I was gotta like,
There we go. - I could do it.
- There's three fingers, yeah.
Tip number three is to use the split-screen,
multitasking features in the iPad to bring up
reference material maybe in a browser or in a different app.
So in this case I'm just going to,
I guess, close out (laughs)
So in this case I'm just going to bring up Safari
at the left of my notes.
I'm gonna change the screen size a little bit
and now if I am, say researching this article
about how to, you know, create a great study space
I can do that over here and I can easily
take notes over here,
but that's not the coolest part.
The coolest part is that you can actually bring in
text and images from whatever other apps you are using.
So if I wanna bring in this image here,
I can just hold it and then drag it in and there it is.
And if I wanna crop it I could, I could go to crop,
I can, you know, maybe cut it down a little bit.
I could add a caption or I can just move it around
and I'm good to go.
I could also highlight actual text content.
So let's just take a couple of paragraphs here,
do the exact same thing, hold that down and drag it,
then it becomes plain text.
And now, this isn't gonna work with your handwriting,
but with images you can actually move them around
and do text wrapping so you can kind of format
your notes the way you want,
which is not something you can do on paper.
Now one thing I liked about Notability in particular
that I didn't find in other apps
was the ability to actually bring in GIFs.
Some other apps would let you do pictures
but they wouldn't let you do GIFs
and you know, sometimes you just wanna bring in like
a Thanos GIF into your notes.
That's very important, right?
- [Tony] And then all that for a drop of clout.
- [Thomas] All that for a drop of clout.
More importantly though, I think, is the ability
to scan in documents.
Now I was thinking I was gonna have to use
something like Scanbot and then import documents
myself like manually,
but there's actually a document scanning feature,
so if you get a handout in class
or you just have a piece of paper
that you wanna put in your notes
you can easily open this and you can just create
a document scan.
- And with that we're gonna go into tip number four
of which is being able to drag
from the left side of your note,
and right here you can see all the notes
that you already have that was previously made
and you can go ahead and click-and-drag the notes
and now you have multitasking of being able to go
from one note to the other simply by clicking,
writing on one, click on the other one
and do the exact same thing.
- And something that I really like about that
is in Notability, and this is something
that is in Noteshelf and some other apps as well,
you can import PowerPoint presentations,
you can import PDFs,
so if you have reference material,
if you have slides from your lecture
that have been given to you ahead of time
you could easily bring in, say a PowerPoint presentation,
have that on the left and now you have the ability
to mark up and highlight anything you want
in your PowerPoint presentation.
You can follow along in class,
but you can also write in your actual note document
and follow along with your slides, which is pretty sweet.
Another thing that you can do
is use this little scissor tool here
and you can highlight pieces of the PowerPoint presentation
or really anything you want, copy it,
and bring it over into your regular notes.
And from there you can add annotations, captions,
you could put plain text next to it,
do kind of whatever you want.
And that brings us to our last tip, which is to do...
- All of it, do it all.
- All of it at the same time, which is a little bit easier
on the Pro, I'm not gonna lie--
- Yeah, it really is.
- But you can indeed do an audio recording,
open up the magnifier, have two things open at the same time
and still use iPad-level multitasking.
So let's say you had a really important piece
of reference material that was in Safari,
you also had class slides that you were referencing
and you still wanted to take notes,
and you still wanted that audio recording,
you can do all those at the exact same time,
which is kind of awesome, I'm not gonna lie (laughs)
- Yeah, and again, I'm following along
and I'm using the smaller 7th Gen iPad
that isn't as big as his,
but I'm still able to keep up with his
so the idea is you can do so much with this app
regardless if you're using older hardware
and still keep up the pace with everyone else.
- So let's talk about the differences
between the base model and the Pro.
Obviously the Pro is a bigger screen,
so it's more screen real estate,
it's gonna be easier to write on,
but you're gonna have to spend a lot more money
to get the Pro.
Now this is my Pro and this base model
is actually on loan from Apple so we could do a review of it
and we've got some other videos coming in the near future.
In fact you did a full review of this on your channel.
- Yes, so if you're interested, feel free.
- And I'll put that in the description down below.
But yeah, what are the main differences
besides just the screen space?
- I mean, so in reality what you're gonna be paying for
is on this one as opposed to this one,
is you're getting an OLED display on here.
On the base model you're also getting a processor
that is three years old,
so imagine having an iPhone 7 processor in this tablet.
It's not horrible, so keep in mind that no matter
what though, Apple really has a good reputation
of having processors that last a long time
and never once using this did I feel like a hiccup
there slowed me down.
- Now I do have a screen protector on this
which is called the Paperlike and my friend Ali Abdaal
is the one who told me about this thing.
It's essentially a screen protector
that tries to create a paper-like texture
and I think it does a pretty decent job.
Again, I would prefer to write on regular paper but--
- I think we all agree with that, yeah.
- This is, you know, this is actually better
than writing on the glass itself.
Okay, I have to issue a small correction
since we filmed yesterday.
I've taken a lot more notes with the Paperlike protector
in Notability and honestly this thing rocks.
It is almost as good to me as normal notebook paper
and may make me take a lot more notes
on my iPad going forward so keep that in mind.
Now one thing that I like to do on my iPad
in addition to note-taking,
and possibly even more than note-taking,
is drawing especially since there's an app on here
called Procreate and I know both of our girlfriends
that use Procreate.
I think my girlfriend uses a different one now
but I use Procreate on occasion to make illustrations
for this channel and I actually made one
for the digital file organization video,
which was a lot of fun. - Yeah.
- So Procreate is definitely an app that I would get
if I was going to be using an iPad on a daily basis
and if you wanna learn how to use it,
and subsequently improve your drawing skills as well,
there is a great class on Skillshare
all about how to draw with Procreate
and how to get kinda good at it.
It covers all the fundamentals,
and since it's on Skillshare you're also gonna have
unlimited access to thousands of different courses
that can improve your skills and also your ability
to compete in the job market.
There are tons of courses on the platform
including courses on video editing, on marketing,
on analytics, animation, photography,
tons of different stuff
and you get access to all of it
for less than 10 bucks a month.
And there're also productivity courses
including one from my friend Francesco
on the basics of Notion, which is, I think
over two hours long, (Tony whistles)
so there's plenty of content in there.
And my course which is all about how to build
an entire productivity system.
And T Something that's coming up in the near future,
I actually have a new course launching on Skillshare
in January so you're gonna want to keep your eyes
peeled for that,
and the best way to do it
would be to sign up at the link down below
which is gonna get you a two month unlimited free trial
of access to their platform
and there's a heck of a lot that you can learn
in two months.
So sign up at that link down below,
get that two month free trial
and as always thanks to Skillshare
for sponsoring this video and supporting my channel.
Thank you as well for watching,
hopefully you found something useful here
and if you haven't subscribed yet
click the picture of me that is over my face
'cause I think that's kinda thematic,
I don't wanna cover your face up with my face,
and you'll get notifications, maybe,
if YouTube decides to send them when I release new videos.
- For once. - Otherwise you can check out
one more video on this channel by clicking right over here.
I am gonna cover your face.
- Yeah, that's fine, whatever works (laughs)
- (laughs) Also go subscribe to Tony's channel
and I will see you in the next video.
- Take care.