Yuan ti - a piece of snake
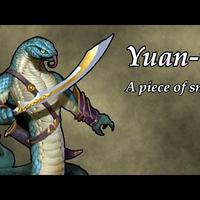
I came to a point in the Callathiforay campaign where i needed some Yuan-ti snake people. These have got a, sort of, lizardy-humanoid top with a snake tail instead of legs.
I would like a squad of five of these Yuan-ti snake people. At £8.50 a pair, that would work out to £21.25, which is a lot.
You can get five models on this Frostgrave snakeman sprue, which at £6.45, is much more palatable. It's a difference of £14.80. The only downside is that these snake men - so to speak - have legs instead of a snakey tale, which is what I want.
But that £14.80 difference justifies me hitting the crafting table, so let's go.
On top of the Frostgrave snakeman sprue, I also need to provide my own: bases; paper clips; and Milliput modeling clay. And that's it.
I tried a bunch of different ways to anchor the paper clips into the bases of the snakeman mini. The best method I found was to drill a hole in the side of the slot from the inside and then thread the end of the paperclip into it. That way I had a length of paperclip that I could run along the length of the slot so that when I wadged some Milliput into the base to secure it, the entire length of paperclip was buried.
Here's me gritting the bases with well-dried builders' sand before I started modelling. There's no real reason why I couldn't have done it afterwards. I used Mod Podge to adhere the grit to the base and then a 50/50 Mod Podge water mix to seal it, once the first pass, as it were, had dried.
That bit of the paper clip that sticks out of the base dictates the form of the model and the flow of the tail, so in bending it in different ways, I'm getting in as much variation as possible between the different models. Before I started working on the tails, I attached the torsos from the sprues. This way, I can feather the join between the tail and the torso when I start modelling the tail.
Making the serpentine lower half is a matter of wadging Milliput around the pin made from the paper clip. It's my impression that snakes' bellies in general look different to the upper part of their bodies: the bit that you can see from above. I wanted to highlight that difference, so I put grooves and, sort of, striations in the sculpt.
To soften up the rough edges in the clay and where you could still see the paper clip, I used tiny amounts of Das clay encouraged into place with loads of water. The Das clay is the brownish areas that you can see against the, sort of, off-yellow of the Milliput in this footage.
Here we go: I haven't gone over the painting of the minis as there's many better painters than me on the 'Tube, although I did use loads of inks and washes diluted with flow-aid, which really helped. I've gone for… what would you say… like a green outer belly and then tan bellies which you can see, sort of, delineated by the marks made in the the Milliput, there. And then to finish off the colour scheme, we've got bronze armour and weapons which goes quite well with the green and the tan.
So what did I learn on this project?
A new way of securing pins to a base. That method of drilling a little hole in the side of the slot, threading a paper clip through it and then stuffing loads of Milliput in to secure it in place is really tough.
Milliput, it turns out, is pretty workable after it goes off. You can have a go at it with a crafting knife, or whatever.
This is a riff on the last point: I learned not to sweat dodgy sculpts too much. You can always use a little tool to scrape bits off, or you can use Das to add to it once the lower layers harden.
Last but not least: watery Das is a good way to feather rough edges or incisions.
And that's pretty much it. You know the deal: like, subscribe, Patreonise and all that sort of thing.
I should say that prices changed fairly significantly since the project was finished. I shot the video late July/August of last year, 2021. Your mileage may vary on the savings you make, if you go through a project similar to this.
As I mentioned in the start of the video, I've got some Yuan-ti in the Callathiforay campaign. The campaign is coming to its closing stages in terms of the game we're playing. If you're interested in the story, there's an entire playlist devoted to it. Please do have a look at it. Although the campaign is coming to an end in the real world, there's still plenty of work to do on the video series.
It's been a while since I've done a crafting video; thanks for watching this far. It's just as well, though, that I don't need to remember a snappy sign-off, which would have gone... here.